If anyone is actually following my blog, they might remember a post I made a number of years ago called "Music to My Ears Part 1." I originally started this post as a work in progress post for refurbishing my sister's half size guitar. Unfortunately, I never finished said refurbishment. However, I haven't stopped playing around with guitar refurbishment.
Disclaimer: I am not a luthier. I have no training in the art of musical instrument construction. Do not attempt this on any instruments yourself. See a professional luthier for advice and refurbishments. The author of this blog is not responsible for damage resulting from attempts to replicate the process documented below.
Here is the patient; a nameless Chinese half size guitar made of maple plywood.
Sticker rosette, bridge was separating.
Bridge wiggled, so needs secured.
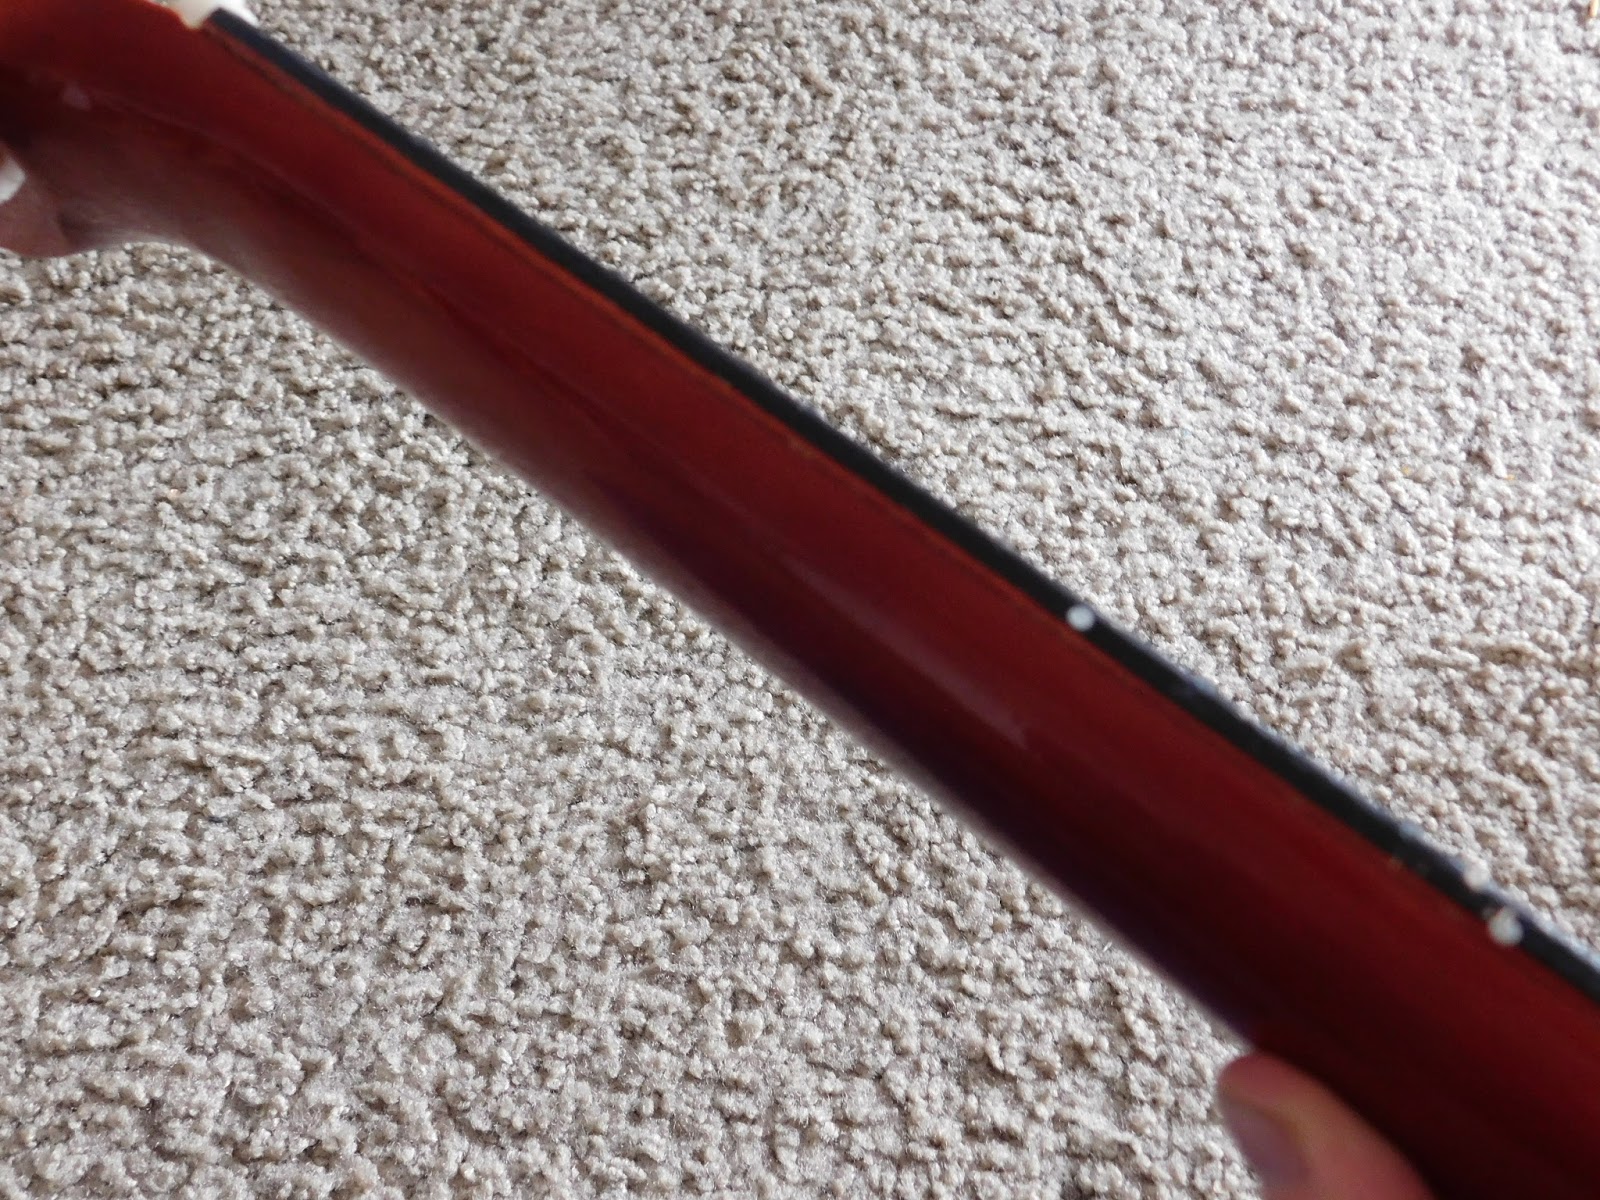
Neck is damaged and slightly cracked.
Some various dings and dents and some glue that's inside the body for some reason. Not a whole awful lot to do, so time to make this complicated.
First to remove the hardware.
Hubert the Horned Owl approves.
Cover your children's eyes! It's naked!
Now onto the bridge.
Took out the plastic bolt covers (didn't save them, I'll replace them eventually...)
Bolts are out and set aside, next step.
I scraped away the at the fret board...
Then some steam into the crack to widen it out.
Slowly getting there...
Losing patience so I put a towel around it to concentrate the heat and steam.
Then I wrapped the whole pot in foil to concentrate where the steam went (Don't have a kettle, but that would have worked nicely for this).
Then, as usual, I got impatient and got my splitter out.
Well... I can totally fix that.
Most problems can be solved with simple tools. Block planes are super useful as you will soon see.
Now time to replace this fretboard. I used just a piece of SYP (southern yellow pine) and cut the curve with a coping saw. Next step is creating the angles on the sides.
Here's that good ol' block plane again.
One side is approximately flush, time for the other.
Pretty much to shape in two axes. Now for getting it thin enough, but first, lets fix it in place.
...and this is what happens when you let your girlfriend take photos.
Lots of books and clamps. Let it dry overnight and then I went at with my block plane (guess what my favorite tool is.)
So many shavings...
A lot is left to take off. I've got to get it down to 5mm.
Ah crap! I chipped out the knot at the end of the fingerboard. Well, we'll worry about that later.
There we go! All done with that.
So many shavings
Now onto sanding the whole thing. I used a Scotch Brite pad to take the varnish off and sandpaper to cut through the paint underneath. I used the Scotch Brite to keep the paper from getting gummed up by the varnish.
On and on
Here you can see where the Scotch Brite has taken away the varnish. Then sandpaper scrapes off the paint.
All this fine dust got EVERYWHERE. Thank God for vacuum cleaners.
All sanded down. The next step is to finish fitting the fretboard.
Truing up the edges to be flush with the block plane.
And finishing up close the body of the guitar with a knife.
Cleaning up the sound hole with sandpaper.
Now the old fret board is laid out on top of the new one to align all the frets. Since I am not a trained luthier or a musician, I do not know the proper placement of the frets for the proper note production. The position of the metal frets is specific and produces a particular note because the frets distance from the saddle on the bridge. The distance from the saddle to each of the frets needs to be very precise to ensure good tuning. Not having a good way to figure out the distances, I used the old fret board. I used a water soluble pencil to mark out along the sides of the new fret board.
Then the line was put across the top of the fret board after the old one was unclamped.
Then I used an old technique I still remember from high school geometry class. It's bisecting an angle with a protractor. Since a straight line is a 180 degree angle, then bisecting it makes two 90 degree angles, or a perpendicular line.
A string helps make that straight line too.
Then, using a variety of tools like pliers and chisels, I pried up all the frets. I taped them all to a piece of paper and numbered the frets so I could track them.
Then I chiseled out new grooves. Note that the frets are T-shaped.
Some cyanoacrylate glue to help hold them more firmly.
One done, one clamped.
A few more.
And done. On to the next.
Just cleaning up the edges, leaving a little angle, and truing up the frets.
Shavings taken from the production and some more cyanoacrylate fill in a few voids that appeared.
Next, I wanted to repair this gap. I drew a dovetail out on the body...
...and carved out the dovetail.
A piece of brass was cut and shaped to fit.
Put in place and later polished.
Now for color. I love black, so lets get going.
All the back, some of the neck.
but on the soundboard, I used a dye called Prussian Blue. Used primarily by machinists to mark metal, Prussian Blue (a.k.a.Iron (III) hexacyanoferrate (II), Turnball's Blue, Parisian Blue, Berlin Blue) was first synthesized in the 19th century and used as a cheap and vibrant alternative to traditional blue pigments like ultramarine which was made from crushed lapis lazuli, a semiprecious stone found predominantly at the time in Afghanistan.
After the painting was done, the whole piece was covered in spray lacquer (well polyurethane technically).
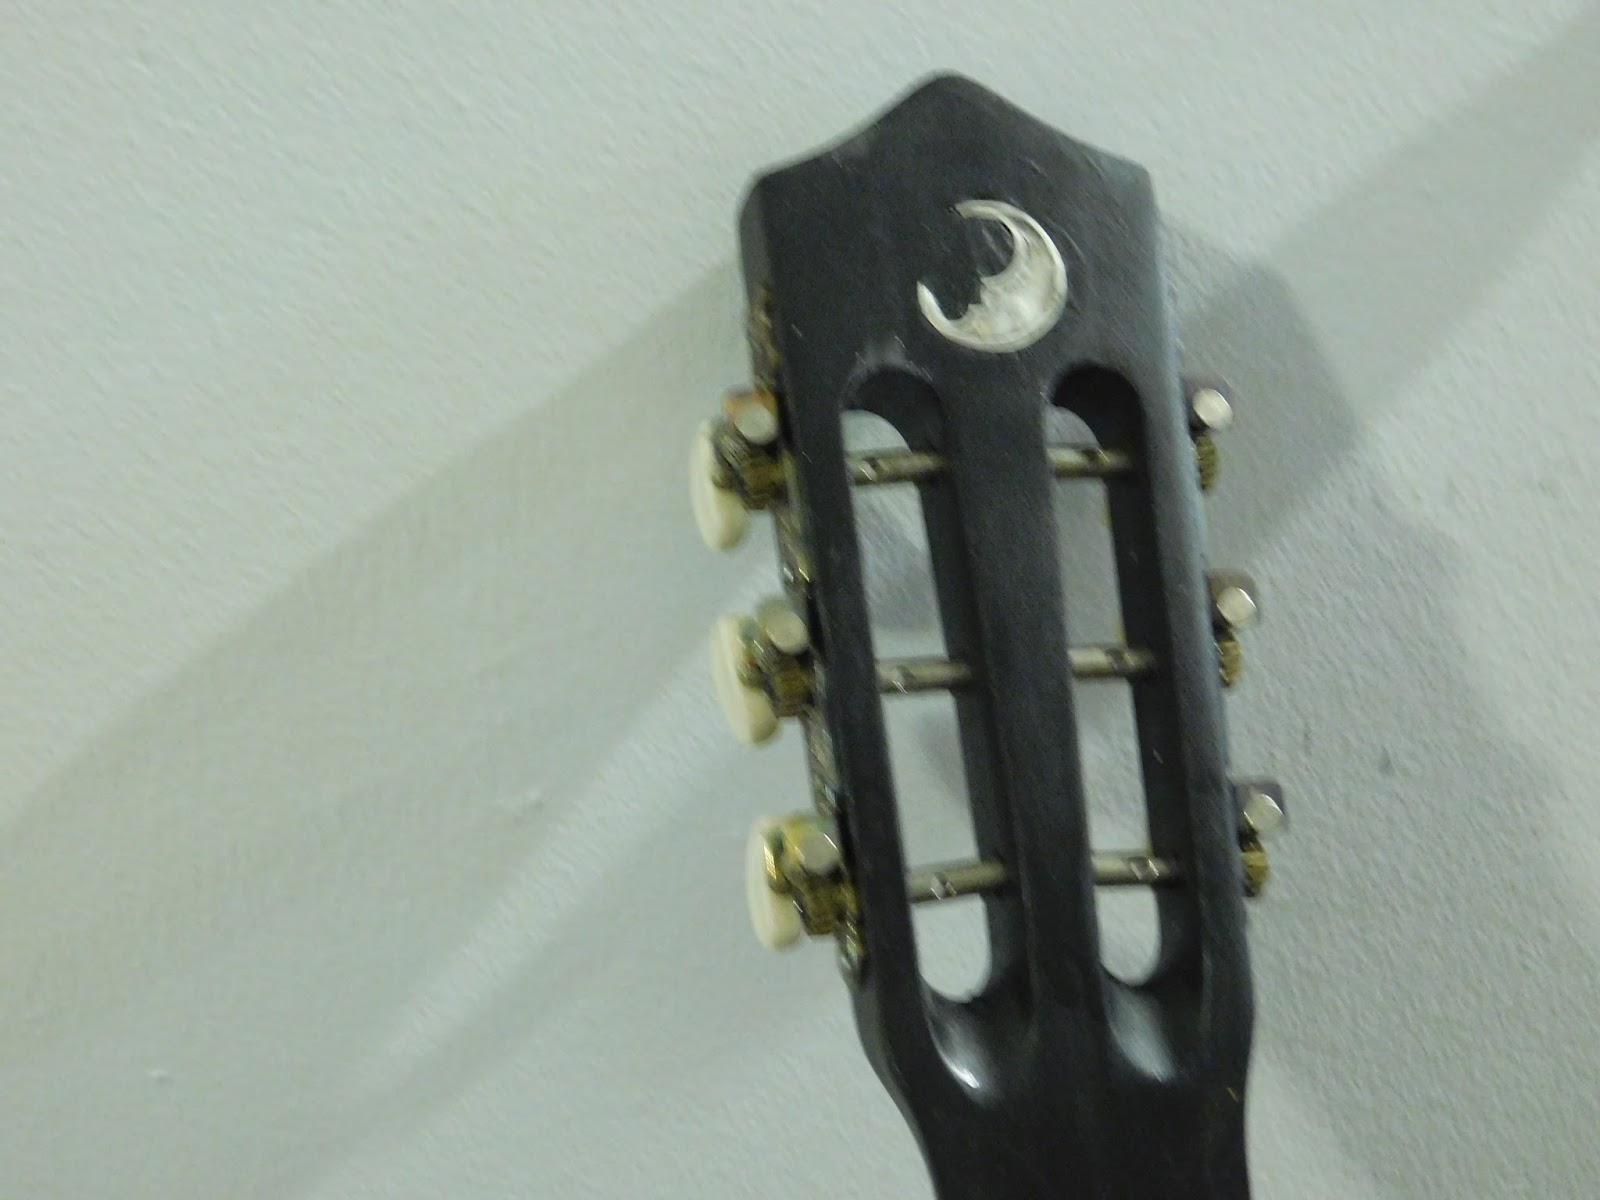
No on to some decoration. Since I can't put a rosette around the sound hole, I can embellish the head. This is a drawing I doodled a long time ago. I left it sitting around but for this I traced out a copy onto a new sheet of paper.
I fixed it to the head with glue.
I carved it all out carefully.
And added fine silver wire around the edges.
Now to make the moon shine like it does in the sky. This is nacre. It is the shiny insides of shells from shellfish like oysters. it is slightly flexible, but flakes into material like this when crushed.
Glue is added and the mixture is pushed into the recess.
After drying the wire and nacre are filed down. Imperfections and voids are noted and filled with more glue and nacre.
Filed again, and now one can see the lovely iridescent quality of the nacre paired with the natural shine of silver.
Putting on the nut afterwards. One more step.
The side plates are blued with a torch to provide compliments to the black and blue color of the guitar.
And then they and the tuning pegs are reattached to finish the head.
I taped off the area the bridge is going to go, and sanded off the finish and pain.
And reattached the bridge with the nuts and bolts and glue.
Some books held it in place while it finished drying.
Now for strings.
And done! All strung up and finished.
The musician loved it. I'd say, a job well done.


No comments:
Post a Comment