Tuesday, October 20, 2015

Learning Curve, Mistakes, and Delays

Hello world. I've been working on metal working and woodworking, I promise! However, I've been at school since late in August so the flow of DIY has slowed quite a bit, but rest assured that I have at least three projects that I'm actively working on this semester.

As I've been in school it has been increasingly difficult to do any hobbies, but I'm still trying. If I can, the cameras come with me to class and I'll snap some shots when I can on campus. I'm also going to try to get out and take more walks now that the fall colors are here (finally). I'm working on my physical projects whenever I can too. My next plan is to finish two of the simpler ones, forge ahead on the big one, and learn new skills for the third. I'm also trying to convince the lovely subject of one of my photographs from the below post to let me to photograph her again, but she's being camera shy. In the mean time, here are a few shots I've neglected to post.


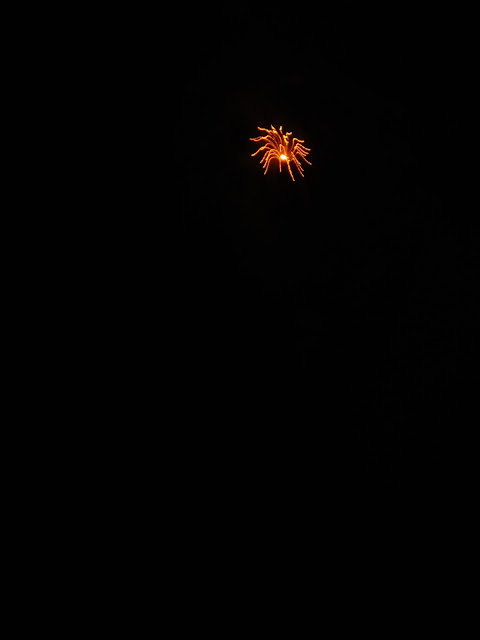
These two are some interestingly distorted long exposure shots of fireworks from this previous July 4th (although, the celebration these were taken at was held on the 3rd). The camera is my Canon Powershot 135 Elph. They are titled Eagle and Lotus.

Tarantula 

Louis the XIV
Chihuly 
These were fun to discover after I shot them. I forgot my tripod so I shot these braced against my knee. I had someone laying on top of me so my knee wasn't 100% stable, hence the fun zigzags. 


These were all shot on a Kodak  Brownie Bulls-eye. The first two are at Ohio State University and the third is from St Patrick's Church in Columbus, Ohio. They were all shot on 120 film modified to fit in a 620 camera. 

This one is from my Anscoflex and was taken at the same location as the other statue in my previous post.


The above two are on the Canon again with the first being made monochrome.


The above two were taken just after a rainstorm on some Panasonic camera belonging to my mother. I don't quite remember the type, but the files are very large and high quality for a macro zoom on a digital point and shoot so I may find out for later use.


These two are on the Kodak again. I posted these just to show you the wonders of photo shop in saving a photo. This was one of my first shots on film too, so the lighting in very dark. I've learned a lot about film since that shot last year.

That's all for now. I'll be posting more soon. Until then, here's a sneak peek. No more hints than that.

Friday, October 9, 2015

Sunsets, Scenery, and People

I've posted some pictures before, so I'll just leave a few here.

I really enjoy the art of photography, particularly film, but I'm not solely interested in it. Digital is fine for what I like to do and usually I do a side-by-side of digital and film.


 These are all from my university. They were taken with an Ansco Anscoflex II on 120 film.


More from the Anscoflex, in my hometown


These above three were taken with a Zeiss Ikon Baby Ikonta on 127 film. The film was corrupted, hence the grainy quality. You can see the numbers from the paper backing on the images, but I liked how that makes the pictures look.

The first of these two is on the Anscoflex again and the second is digital on a Canon Powershot Elph 135. This was a shift I made recently to try to photograph human subject purposefully as opposed to scenery or objects. The first is reversed because of the way the Anscoflex functions.


These two above are on the Canon again.
That's all for today. I'll post more sometime in the future. Unfortunately, I haven't been able to do a lot of my metalworking hobbies, but right now I'm researching new methods and working on making rings and jewel settings without casting and I have two additional rings to cast sometime in the future. Hopefully, I'll document that process in detail.

Thursday, July 30, 2015

Closing Projects and Prongs

In my previous post, you saw my rough pendant that I'd been working on in silver. Recently I got a shipment of white sapphires from Thailand to finish up this project.


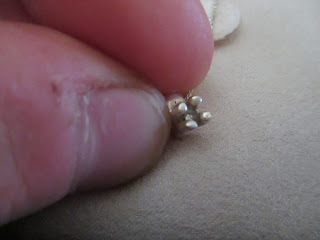
Before the jewels came, I also received a very nice silver box chain for the pendant. After some very careful setup to make sure if I dropped a gem it wouldn't bounce away to Never Neverland, I took one sapphire out of the bag and set it into the prongs. After much drilling, scraping, squeezing, bending, sanding, filing, and polishing it is done.


The gem seems to have been darkened. That's either because the prongs are too large or because there's some polish or dirt behind the stone that the ultrasonic bath didn't remove. For now, I'm happy with it and excited to do more with the sapphires.

Saturday, July 18, 2015

"The Lord has turned my mourning into dancing!"

If you've seen previous postings here, you'll have seen some of my casting attempts. Sad to say I've been working on casting metal for approximately two or three years and only recently have I had any substantial success. I wear a silver ring on my right hand I made a number of years ago. It was one of my first really good castings. The model was a wooden year I'd made and posted on this blog (you can see some below or on previous pages). The ring cracked and I wanted a more substantial replacement. So I used Delft clay to cast the piece after watching some videos for it on YouTube. This gentleman was absolutely crucial in my completion of my ring.

Other than sand casting as Delft clay casting is (despite the name), there is a process called lost wax casting. LWC is ancient. The earliest archaeological finds of this process are around 5700 years old from the region known as Palestine/Israel. The idea is simple enough. Take a wax such as beeswax, carve or mold it into the shape you want, attach some wax channels, cover in clay or similar material, burn the wax out, pour in liquid metal. Although that sounds easy enough, the process is quite laborious and time consuming. I've been trying to cast with this method for two years but with little to show for it. The closest I came to a success is documented on this blog further back in time.

Nowadays, LWC is done with a variety or different kinds of waxes. Just like Inspector Clouseau said "Wax is not just wax." I've used a form or wax commonly known as jeweler's wax or jewelry wax. It is blue, hard, and contains amounts of plastic to make it harder. Some wax compositions are hard enough to be put onto lathes or CNC machines. I prefer beeswax though. The easy of modeling and melting of this wax means it is very simple to reuse. To carve, one needs sharp tools and perhaps a freeze nearby. The freezer helps keep the wax cool and hard after handling in your warm hands.

I'd recently done some of this work to make a solitaire style ring. I had set my sights on jewel setting a long time ago, but now I could finally see a representation of what I was going to do. I took about two or three days making the model. Then the model sat in the freezer overnight and was set into plaster of Paris. I use DAP professional quality style plaster you can get at the hardware store. The reason is availability and pricing mostly, but the composition of it is different from others, containing calcium carbonate and crushed silica. This increases strength and heat resistance.

After making the mold, I had to wait for a new crucible to come, but as soon as it came, I fired up the forge. I set the mold in there to burn it out. After it stopped smoking, I grabbed it with tongs I'd modified to hold the crucible. I held it upside down over the quench bucket to see if any wax would pour out, but SPLASH! I dropped the mold I'd been waiting a week to cast into my quench bucket. Plaster is water resistant, but when it reaches 392 degrees Fahrenheit it will revert back to the form before water was added. Needless to say I was mad. Thankfully when I threw the tongs, they missed the car.

Round two of ring making went better, but I stupidly sprued the model incorrectly so I ended up with this.
A complete disaster. The silver was cold, spruing led to air pockets, and the casting was porous. Not to be defeated I tried again. This time I went for a single stone pendant idea I'd had on the back burner. I sprued it up and set about putting three plaster coats as well as wire reinforcement.
I used a new set of tongs better suited to picking this up, set it in the forge, and watched it burn. Placing the mold in sand, I set about melting the silver, this time running the forge extra hot. I poured and held my breath. The side sprue erupted with silver out the side. I felt triumphant pouring out the last of the silver, but previous experience had taught me to expect defeat again.

I pulled it out of the sand and left the mold to cool for a few and went inside to share my worries with anyone who'd listen. I then went outside, picked up the mold in my tongs, and quenched it. After the bubbles subsided, I saw that it had worked! I had a casting from LWC method for the first time!
After cleaning it looked like this.


I then set about getting it ready for a jewel. After ordering a chain, I looked to see if I could set some grooves in the tines to make them more like this video. Files wouldn't work so I had to check through my Dremel tools. Unfortunately, I had no such tool. So, I made one.
Then I made the grooves.
The chain comes Friday so I'll drill the whole when it arrives. The hard part now is to get a gem for this. For economic reasons, I can't just get one this size so I'll have to get something on the order of twenty. I just don't know what color or type of stone to get since I'll be using them for the rest of the project with stones. I'll see if I can do an update soon with the finished project.



Thursday, May 28, 2015

Knot What You Were Expecting, Hmm?

I just finished up this little box. I don't quite recall where I got the original from. Probably my sisters. It was a simple jewelry box with a glass top. The glass cracked in two and the outer frame that had just been glued popped apart. I drilled, pinned, and glued that back. To replace the glass, I carved up a poplar board with these Celtic knots. I'll admit, I'm annoyed with myself for gluing the lid slightly crooked, but I like it. Ran into quite a bit of trouble with the copper makers tag. Four homemade stamp attempts later, I just used tape to mask the copper for etching, hence the fuzzy edges of the etch. Next step, make some dividers and ring holders.


Sunday, January 18, 2015

Black-Hearted Blaggard

It's been a bit since I posted last, but I thought I'd share a bit with you guys. I've always loved the claddagh rings. They're essentially a pairs of hands holding a crowned heart like this.

My sisters all have claddagh rings so when my youngest sister's cracked, she got a new one. I asked for the original and got to work on it. The ring was small, probably a size 6 or 7, so no way I could just repair it and wear it, but I thought, "Why not do something different?

I'd had the idea of making a claddagh necklace for some time. I'd see them and thought it'd be a nice gift for someone since you didn't have to worry about the size of the ring.

To start, I cut off the band and left the cuffs, hands, heart, and crown.


Next, I took it and put it in the forge to anneal the metal for flattening.

Then I hammered out the edges

Then on to some cleaning and filing

Then I formed, cut, and selected two loops for the sides.

I forgot to photograph the next few things, but I soldered those loops on the ends and then did something quite interesting. I filled the void that used to be filled with glass (it shattered in the forge) with a complex metallic compound called niello. Niello is a compound formed from copper, silver, lead, and sulfur. The substance is a metallic bluish grey-black. Here's what the final product looks like.

Hope you enjoyed.
Cheers!